
[Shopify] How to Add Input Fields to the Admin Panel Using Metafields
- Tips
- Technology
- Shopify
Summary
This article explains how to use Shopify's Metafields feature to add input fields to the admin panel for posts and pages.
What are Metafields
Metafields are a feature that allows you to add custom input fields not provided by default in the admin panel. This enables customization of Shopify's functionality and appearance.
How to Add to the Admin Panel
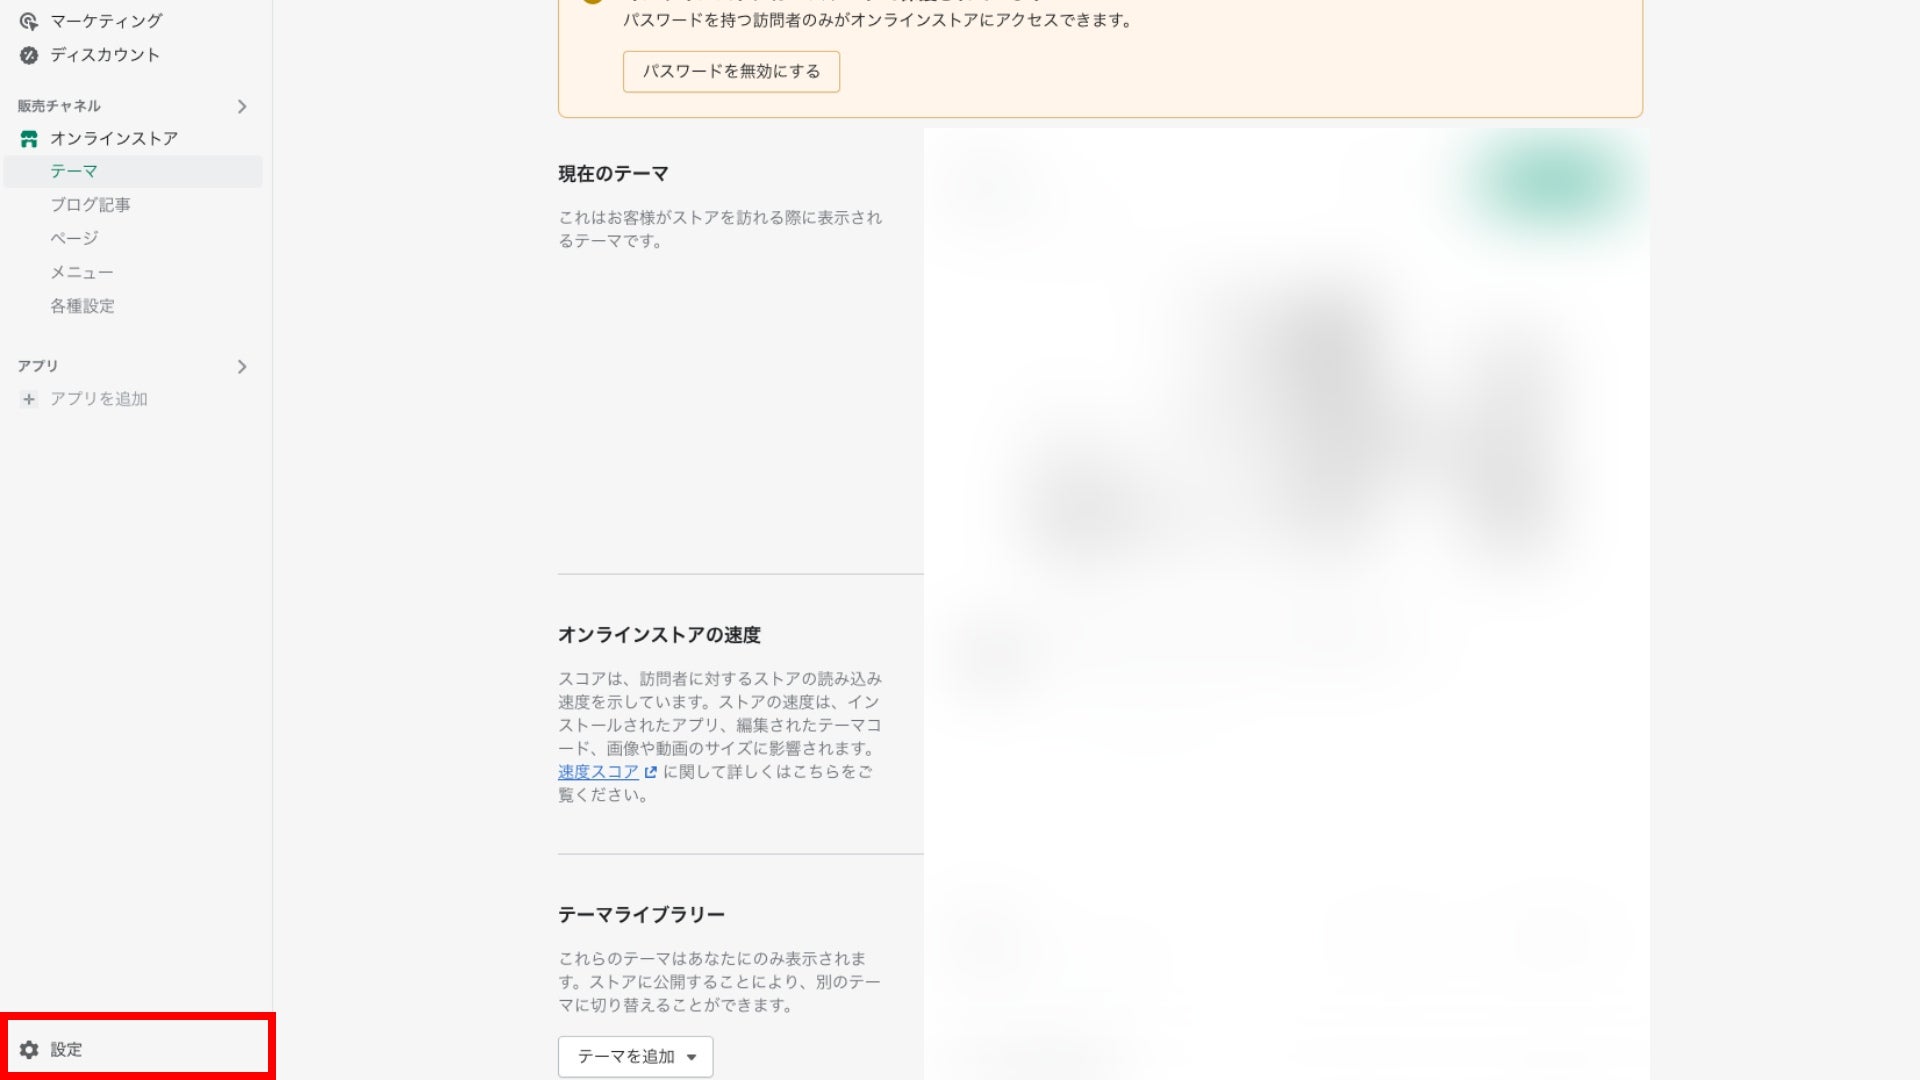
Select "Metafields" from the settings in the admin panel's side menu.
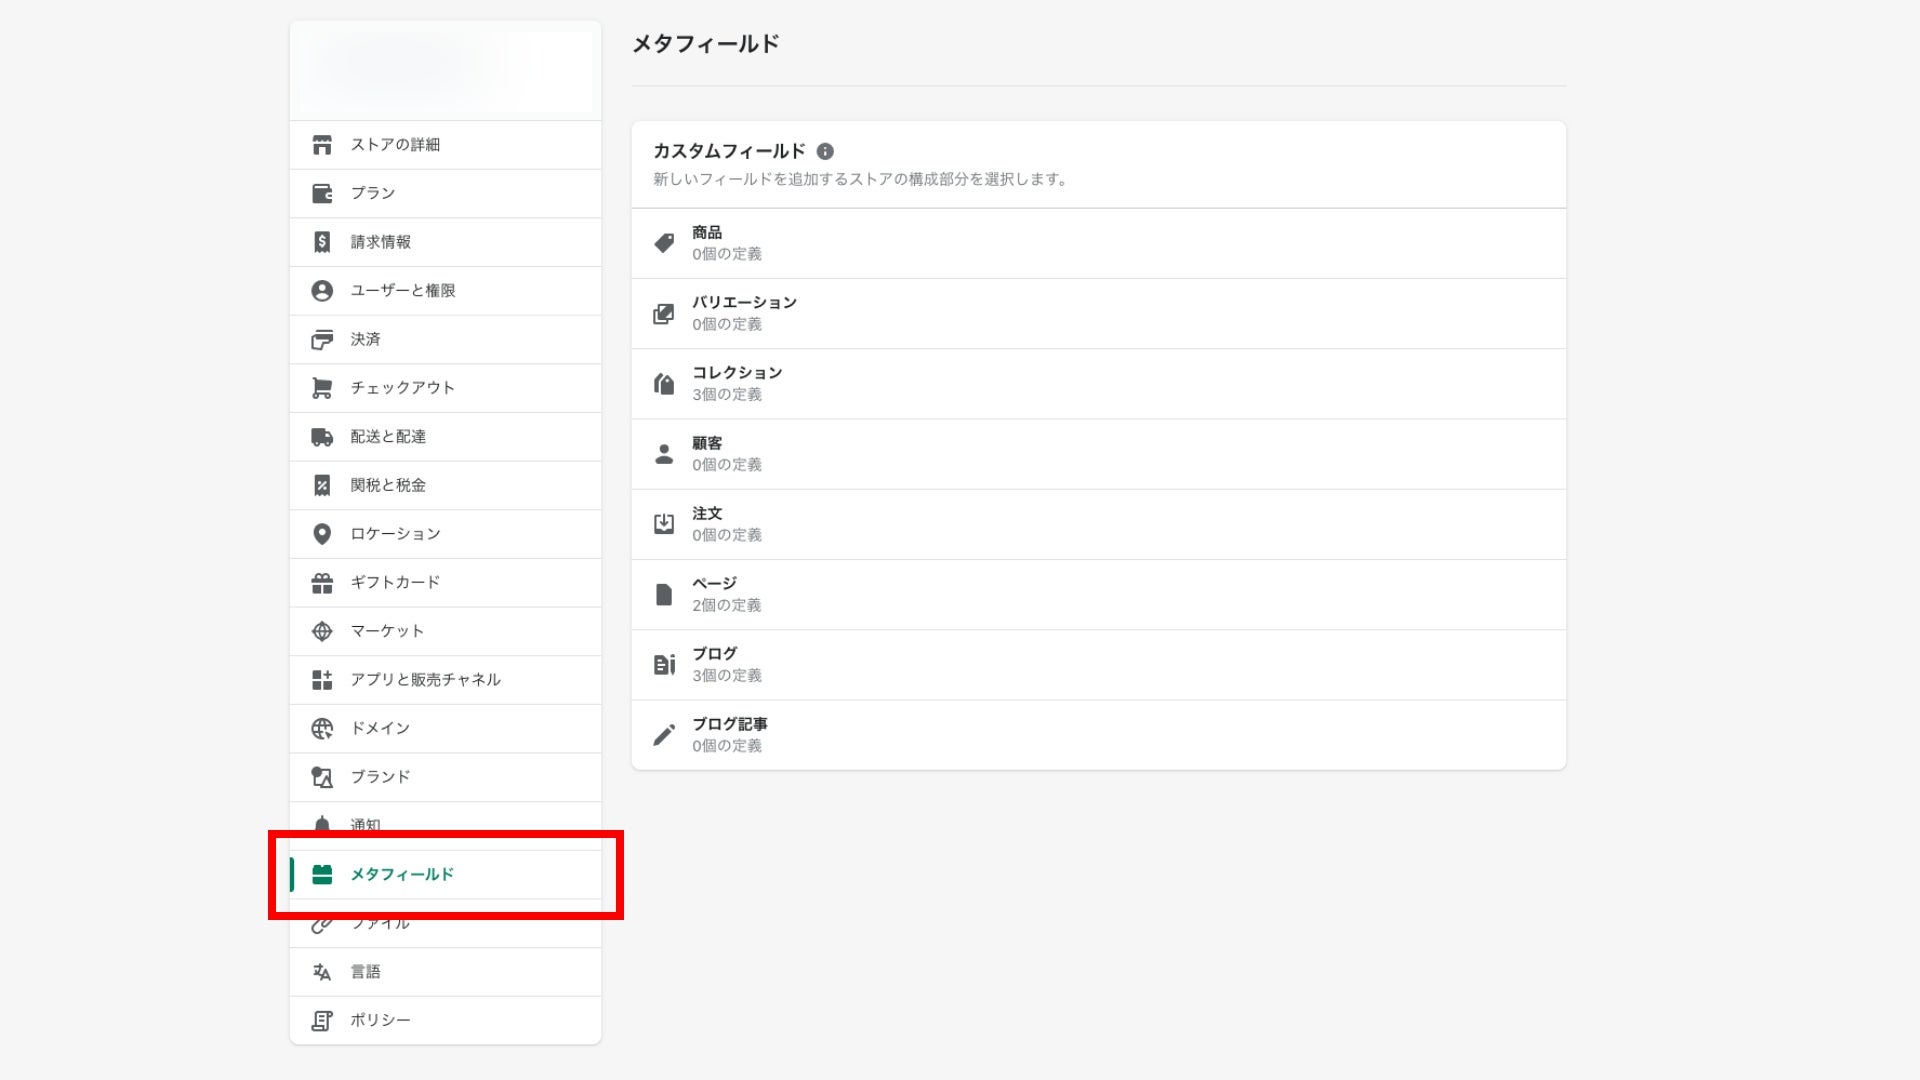
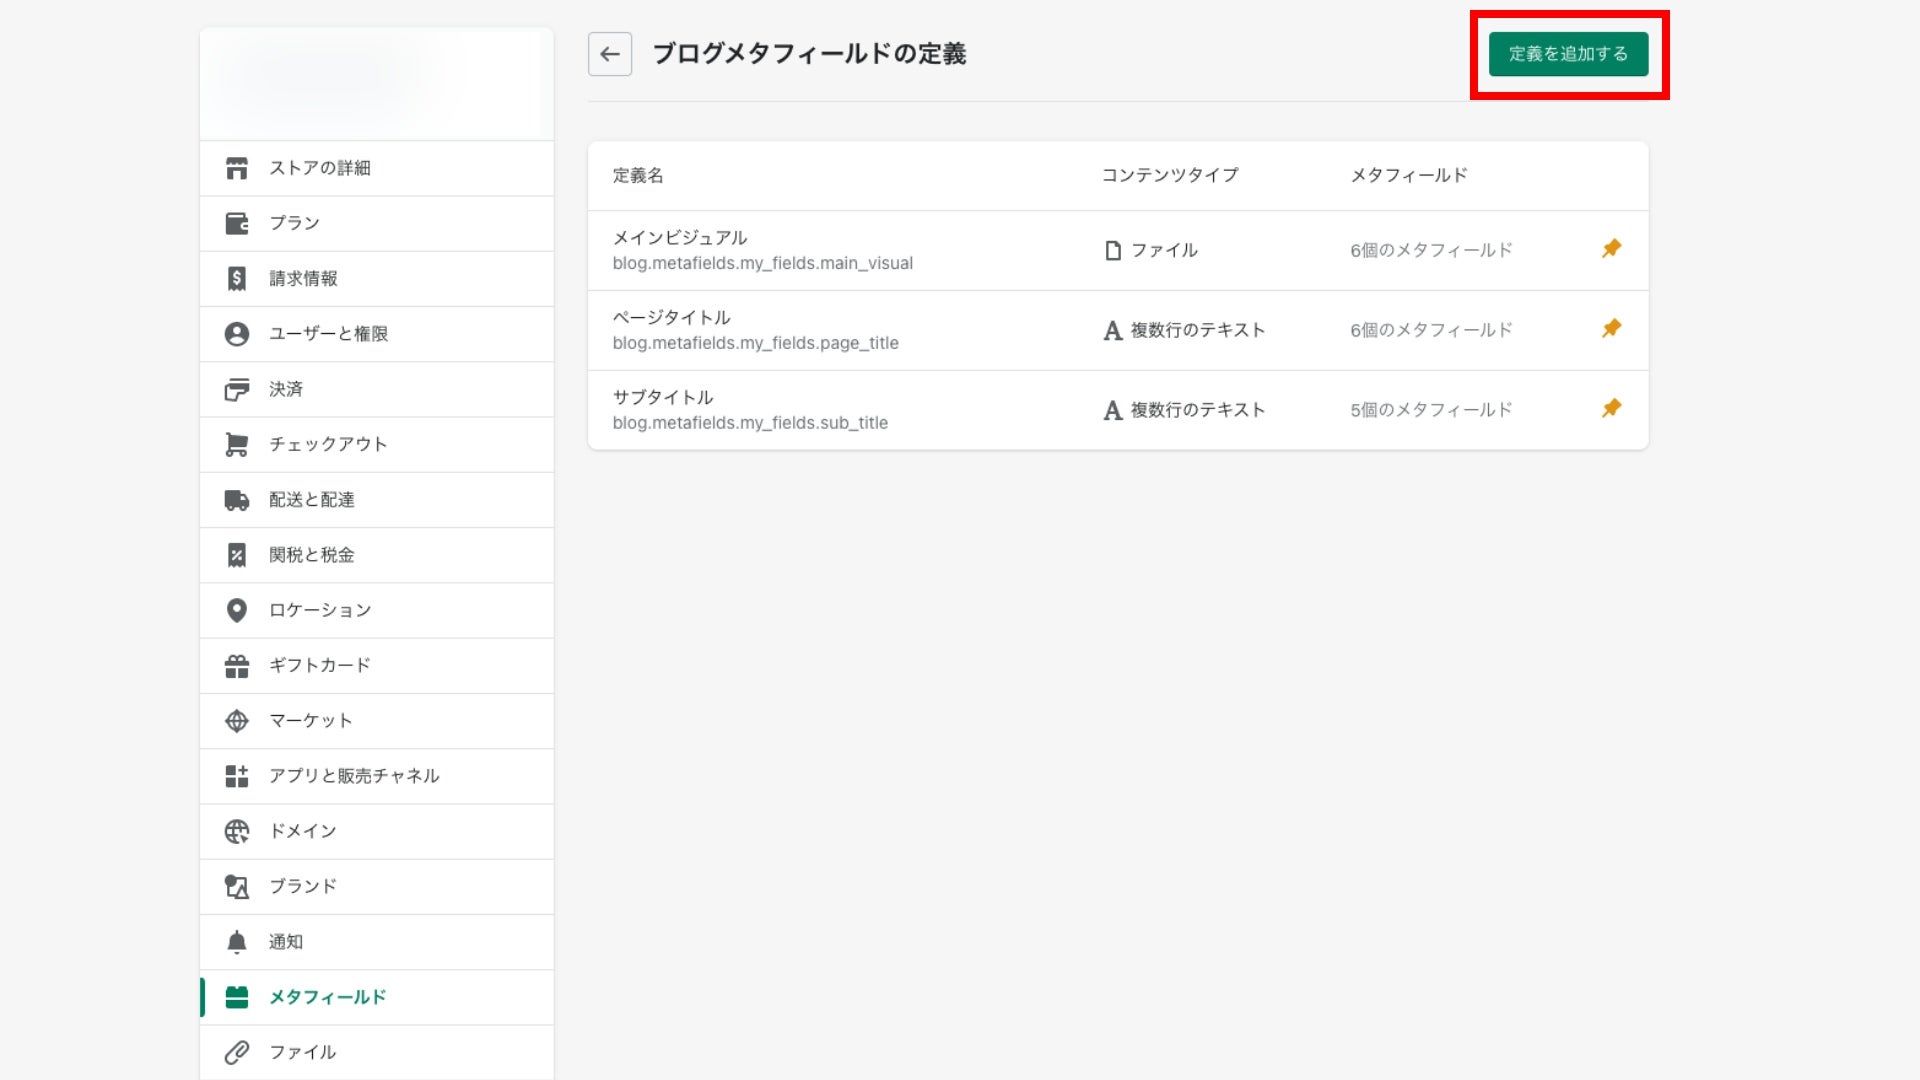
Choose the field where you want to add the metafield (for example, adding a metafield to a blog).
Add a new metafield by clicking the "Add Definition" button.
Enter the required information for each field
- Name: The name of the input field displayed in the admin panel.
- Namespace and Key: The name used when outputting with Liquid (cannot be changed after creation).
- Description: A description displayed in the admin panel.
- Public API: Decide whether to expose it as an API to external sources (not required if not using the Storefront API).
- Content Type: The type of input field displayed in the admin panel (cannot be changed after creation).
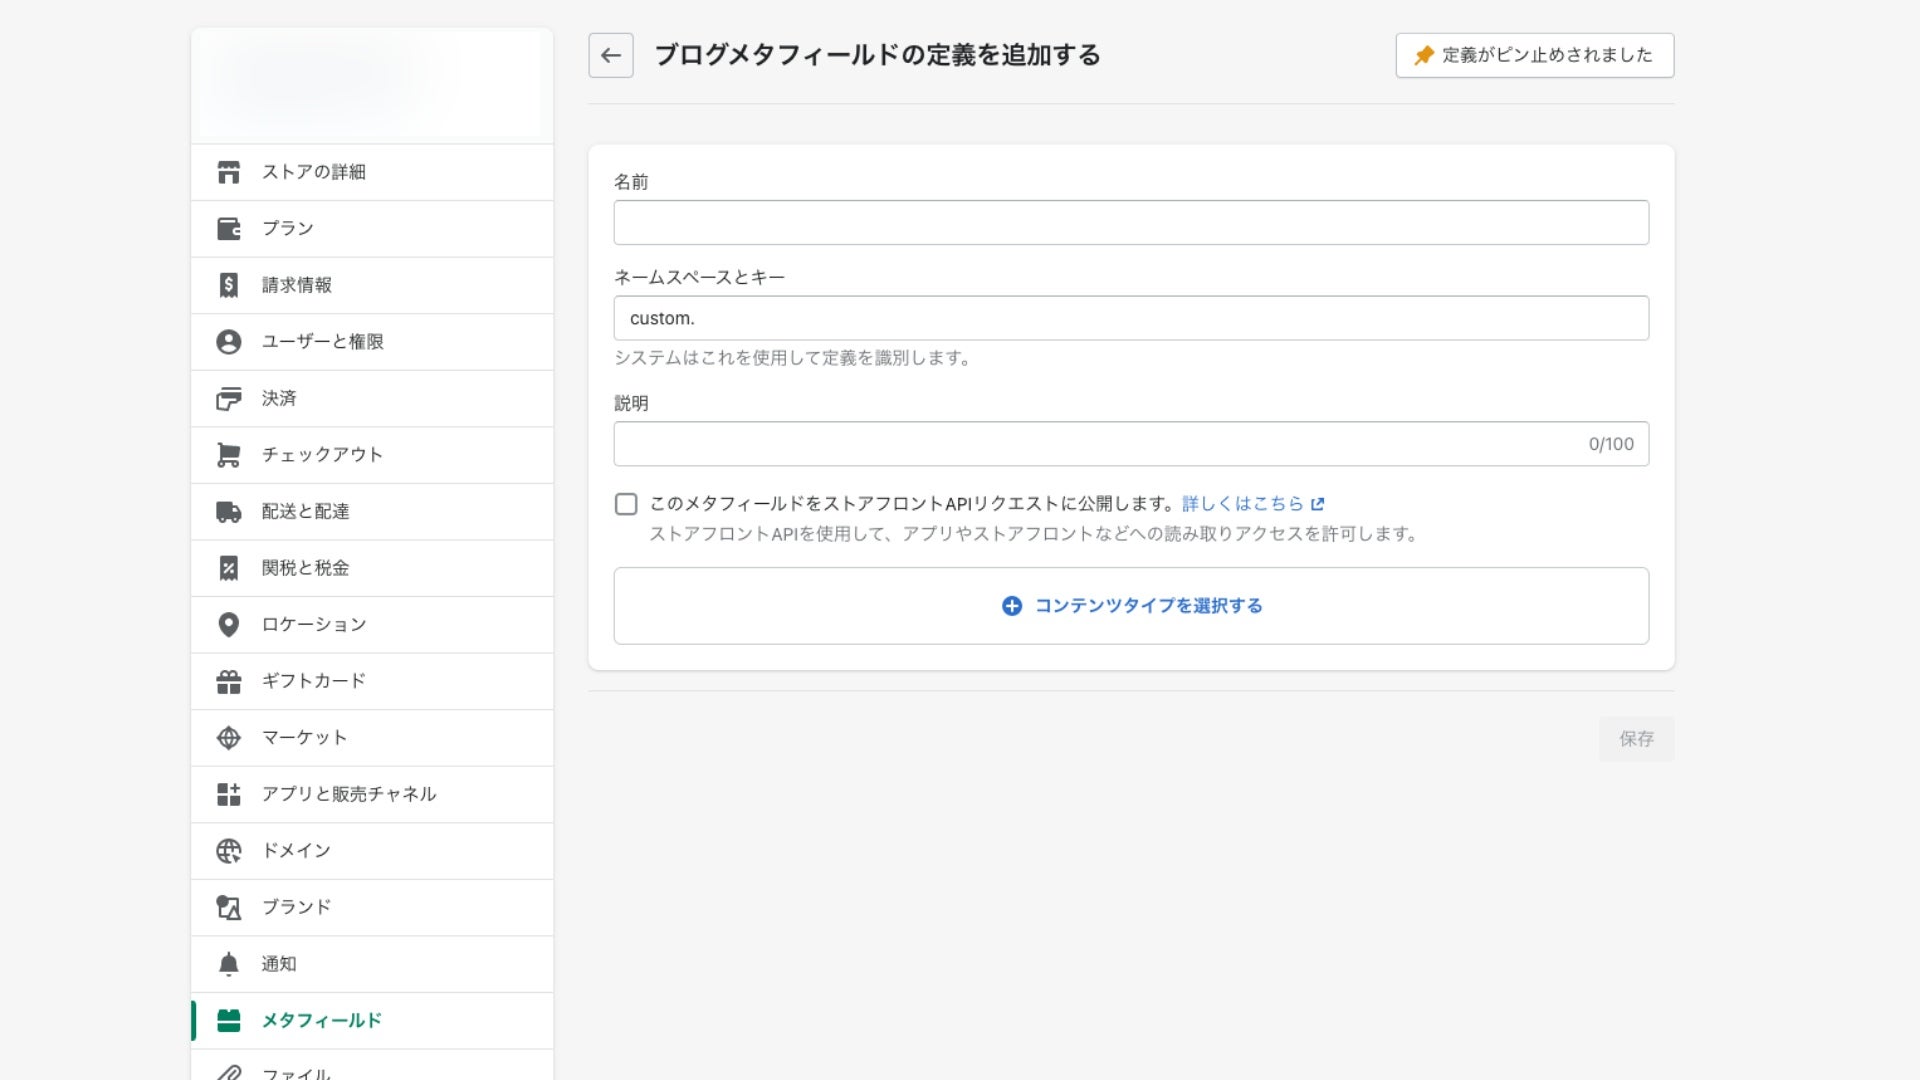
Click the "Save" button to add the metafield.
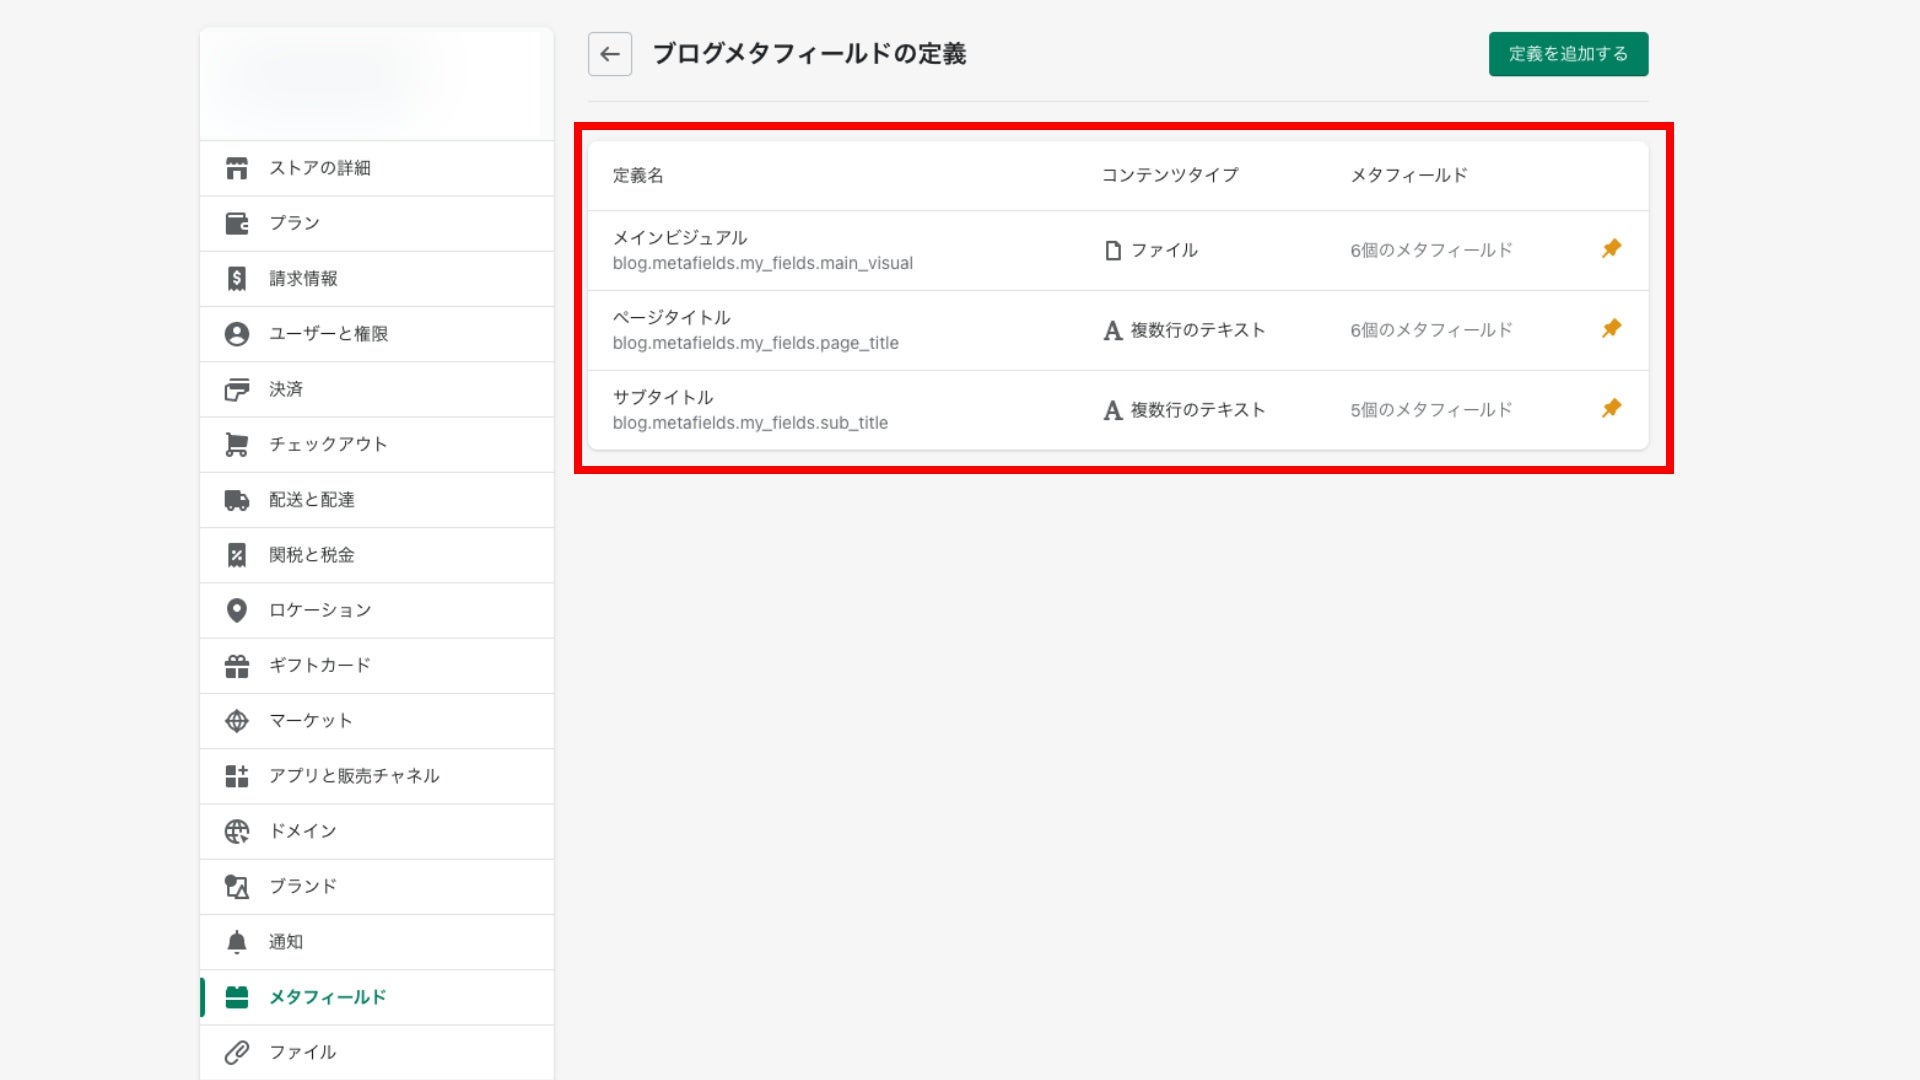
The input field will now be available in the editing interface and other relevant sections.
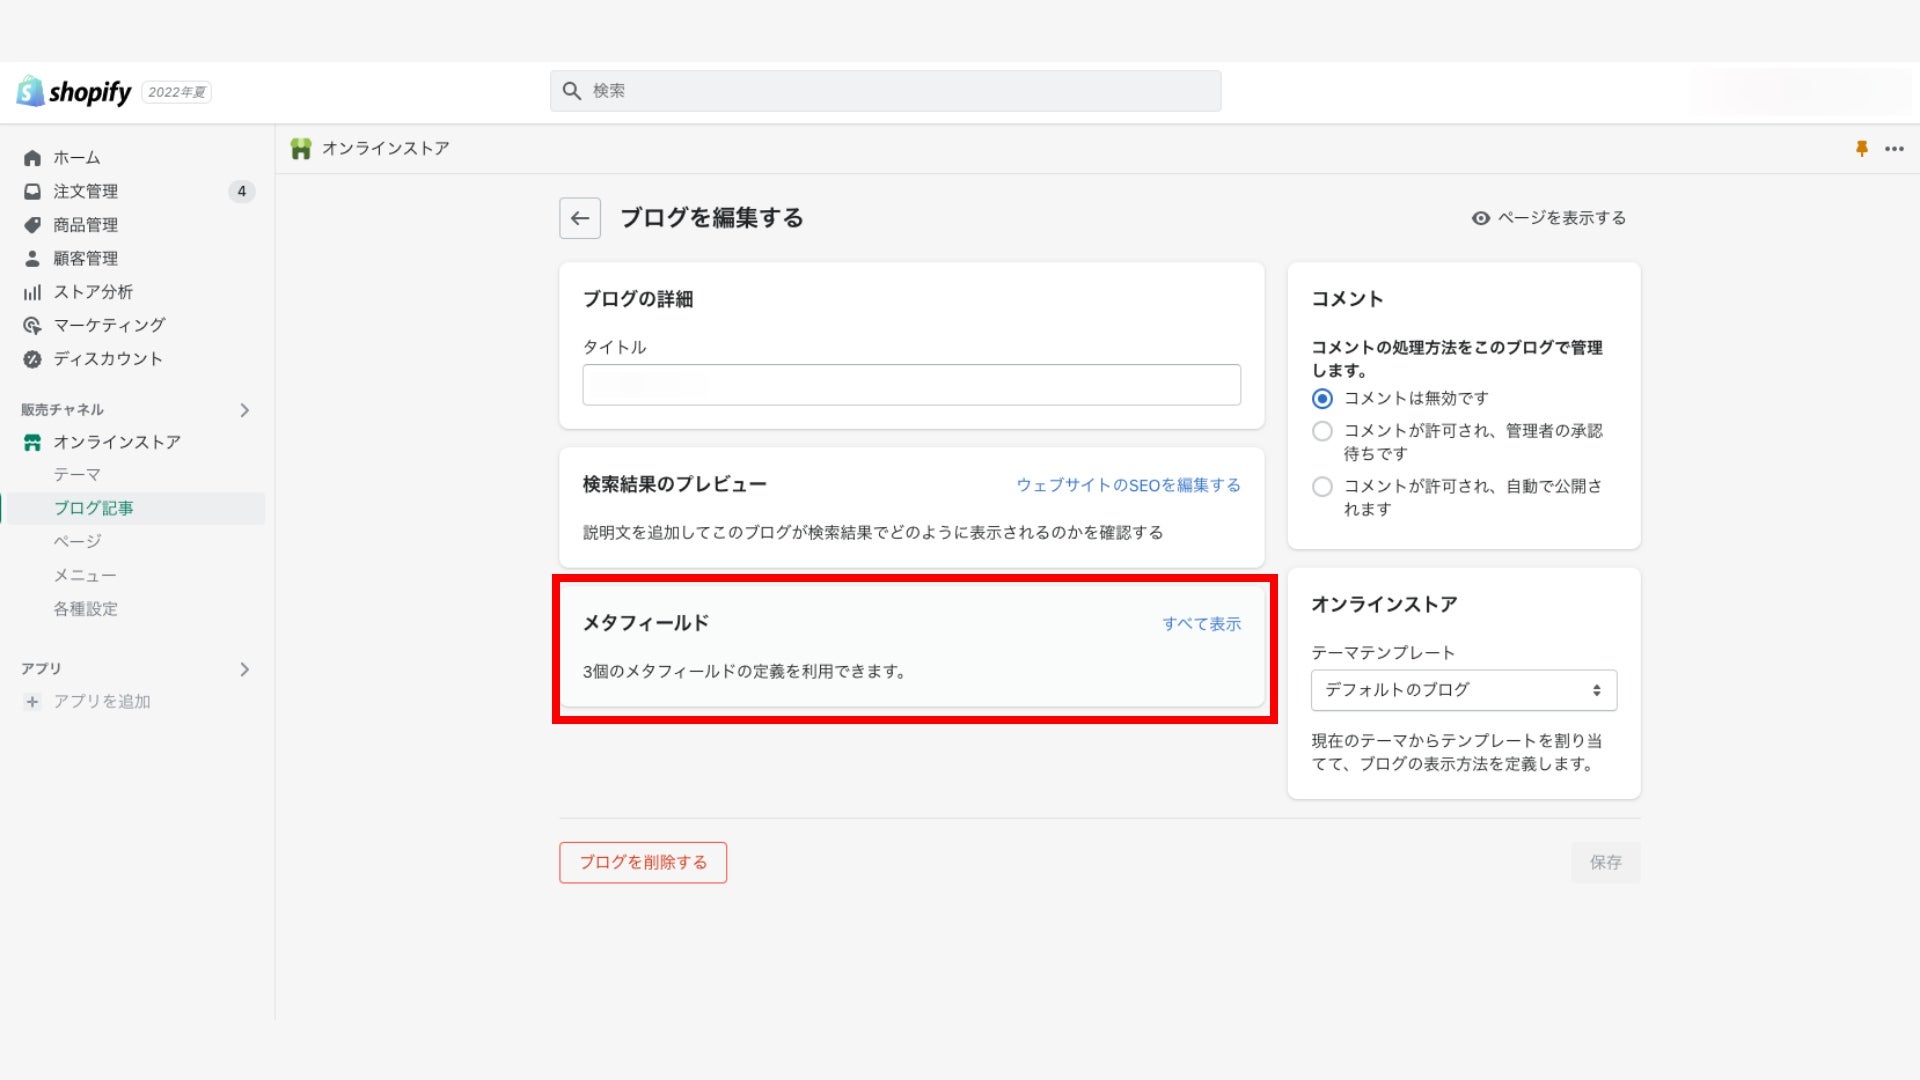
Using Liquid to Output
You can display the content of the metafield entered in the admin panel on various store pages by adding Liquid code. Here's how to do it:
First, check the definition of the metafield in the admin panel to see how it can be accessed by its name.
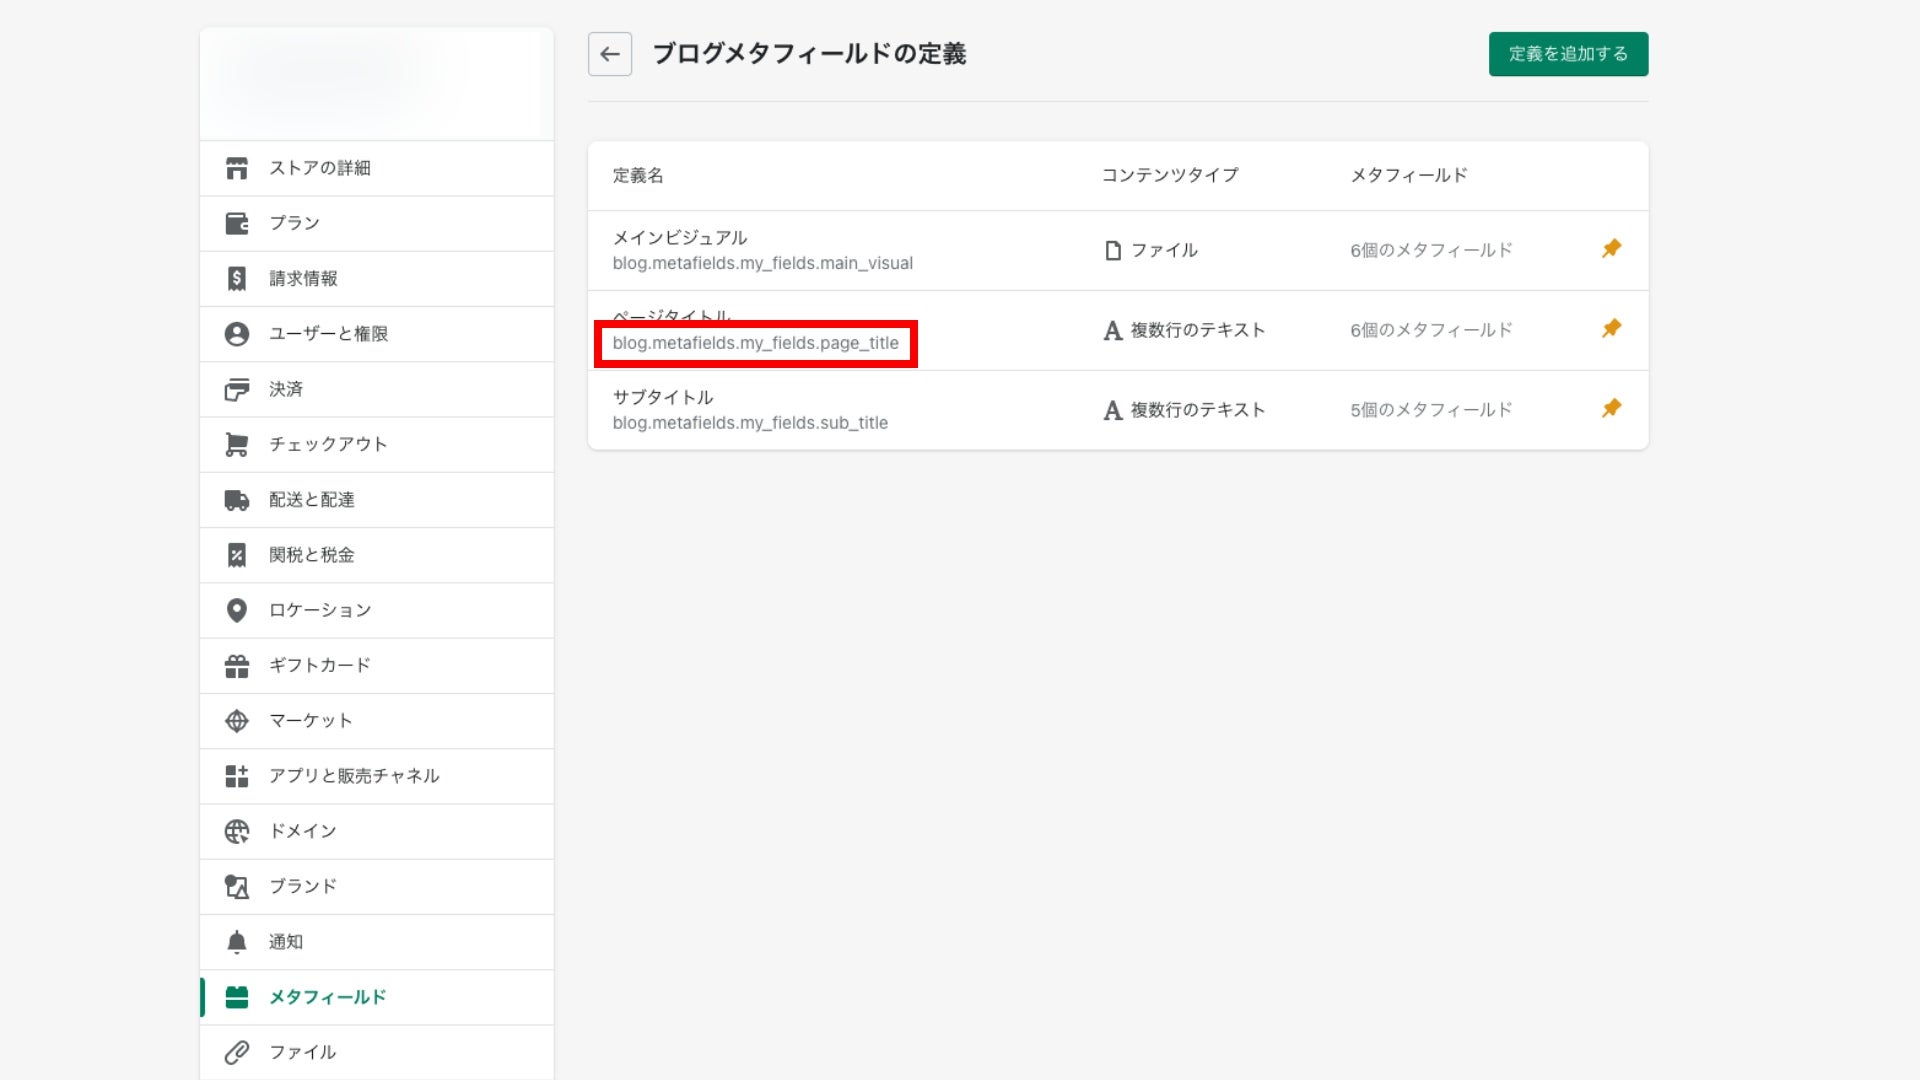
Add Liquid code using the retrieved name to output the content on the desired page.
For example, to display a page title entered in a metafield:
Text
<h1>{{ blog.metafields.my_fields.page_title }}</h1>Image
<img src=“{{ blog.metafields.my_fields.main_visual | img_url: 'master' }}” alt=“” />
